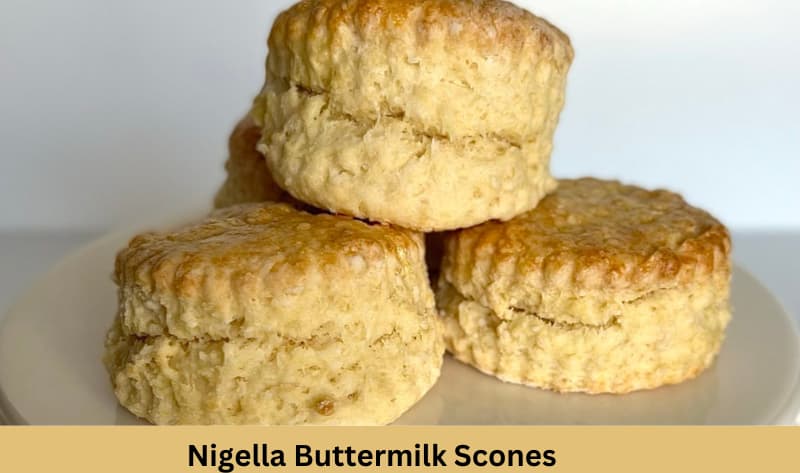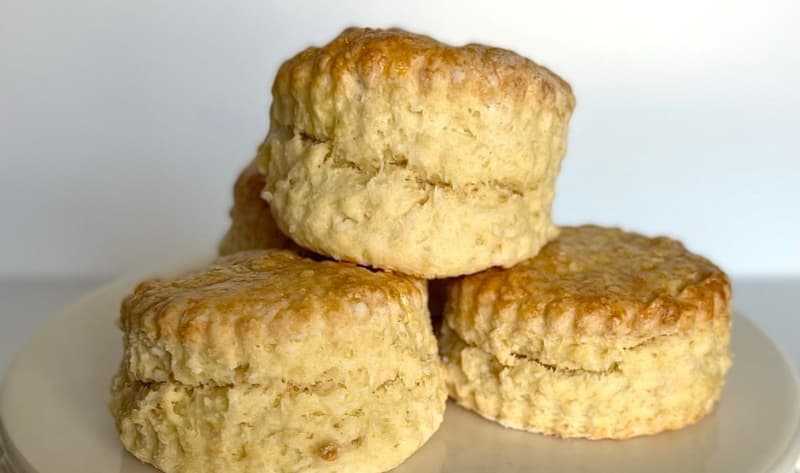
Nigella Lawson’s Buttermilk Scones are a simple yet delicious recipe that’s great for any time of the day. Whether you’re looking for something to have with your morning coffee, an afternoon snack, or even a light breakfast, these scones are perfect. They’re easy to make, needing about 30 minutes to an hour from start to finish, and serve 6-8 people.
What are Nigella Buttermilk Scones?
Nigella Buttermilk Scones are a variation of the traditional British baked good, known for their rich buttermilk taste and tender, flaky texture. They offer a delightful balance between the richness of buttermilk and the softness of the scone, making them a favorite among baking aficionados.

Other Popular Recipes
Why You’ll Love This Recipe
- Quick to Prepare: Ready in under an hour, these scones are perfect for unexpected guests or a sudden craving.
- Versatile: Serve them with clotted cream and jam for a classic treat or enjoy them plain with a cup of tea.
- Deliciously Soft: The buttermilk ensures a tender crumb that’s simply irresistible.
Ingredients Needed to Make Nigella Buttermilk Scones
- Self-Rising Flour: 2 cups (about 250g or 8.8 oz) – forms the base of your scones.
- Baking Powder: 1 teaspoon (5g or 0.17 oz) – gives the scones their rise.
- Salt: ¼ teaspoon – enhances the flavors.
- Unsalted Butter: ¼ cup (about 60g or 2.1 oz), cold and diced – adds richness.
- Sugar: 2 tablespoons (about 30g or 1 oz) – just the right amount for a touch of sweetness.
- Buttermilk: ¾ cup (about 180ml or 6 fl oz) – adds moisture and a slight tanginess.
- Egg: 1 large, for glazing – gives the scones a beautiful golden finish.
Note: It’s always a good idea to have a little extra buttermilk on hand, just in case your dough is too dry and needs a bit more moisture.
Useful Equipment
- Large mixing bowl
- Pastry cutter or fork
- Baking sheet
- Parchment paper
- Rolling pin
- Round cutter (about 2-3 inches in diameter)
- Pastry brush
Instructions to Make Nigella Buttermilk Scones
Step 1: Preparation
- Preheat the Oven: Begin by heating your oven to 220°C (425°F). This high temperature is crucial for getting that lovely rise and golden color on your scones.
- Prepare the Baking Sheet: Line a baking sheet with parchment paper. This will prevent the scones from sticking and ensure easy cleanup.
Step 2: Making the Dough
- Mix Dry Ingredients: In your large mixing bowl, combine 2 cups of self-rising flour, 1 teaspoon of baking powder, and ¼ teaspoon of salt. Stir these together to ensure they are well mixed.
- Cut in the Butter: Add the ¼ cup of cold, diced unsalted butter to the dry ingredients. Using your pastry cutter or a fork, cut the butter into the flour mixture until it resembles coarse crumbs. The goal is to have small, pea-sized pieces of butter throughout, as this will help create a flaky texture.
- Add Sugar: Stir in 2 tablespoons of sugar to the mixture.
- Incorporate Buttermilk: Make a well in the center of your flour mixture and pour in ¾ cup of buttermilk. Using a fork, gently mix everything together until it just begins to form a dough. It’s important not to overmix; the dough should be soft and slightly sticky.
Step 3: Shaping the Scones
- Flour Your Surface: Lightly dust a clean surface with flour. Turn the dough out onto this surface and gently knead it a few times to bring it together.
- Roll Out the Dough: With a rolling pin, gently roll the dough out to about an inch thick. This thickness is key to getting the perfect scone height.
- Cut Out Scones: Using your round cutter, press down into the dough to cut out the scones. Do not twist the cutter, as this can seal the edges and prevent them from rising properly. Transfer the cut scones to your prepared baking sheet.
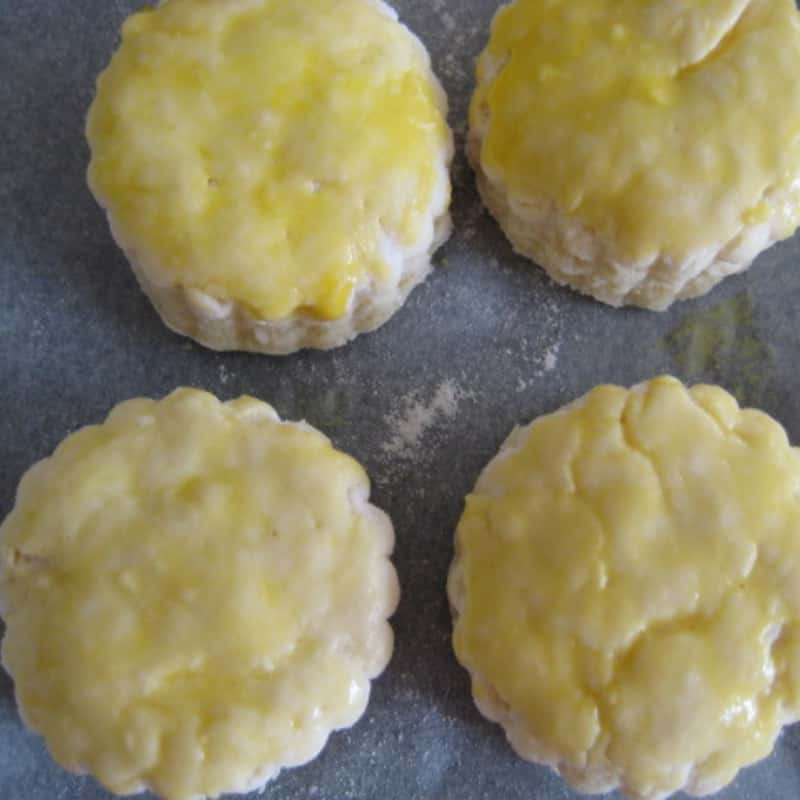
- Glaze: Beat 1 large egg and brush the tops of the scones with it. This will give them a lovely golden color as they bake.

Step 4: Baking
- Bake: Place the baking sheet in the preheated oven and bake for about 12-15 minutes, or until the scones are well-risen and golden brown on top.
- Cooling: Once baked, remove the scones from the oven and transfer them to a wire rack to cool slightly. They are best served warm.

What Do I Serve With Nigella Buttermilk Scones?
Pairing your freshly baked scones with the right accompaniments can elevate your tea time or breakfast to new heights.
Here are some delightful pairings:
- Classic Clotted Cream and Strawberry Jam: Nothing beats the traditional combination of clotted cream and strawberry jam atop a warm scone.
- Lemon Curd and Fresh Berries: Add a zesty twist with lemon curd and a handful of fresh berries for a refreshing taste.
- Soft Cheese and Chutney: For a savory option, try soft cheese with a tangy chutney.
- Butter and Honey: A simple spread of butter and a drizzle of honey brings out the natural flavors of the scone.
Expert Tips to Make Perfect Nigella Buttermilk Scones
Achieving the perfect buttermilk scone is all about technique and attention to detail.
Here are some pro tips:
- Do Not Overwork the Dough: Handling the dough too much can lead to tough scones.
- Keep Ingredients Cold: Using cold butter and buttermilk helps achieve a flaky texture.
- Avoid Twisting the Cutter: Press straight down when cutting out scones to encourage a good rise.
- Brush with Egg Wash: For a golden finish, lightly brush the tops with beaten egg before baking.
Variations of Nigella Buttermilk Scones
Scones are wonderfully versatile, allowing for numerous variations to suit any taste:
- Cheese and Chive Scones: Add grated cheese and chopped chives to the dough for a savory twist.
- Lemon and Poppy Seed: Incorporate lemon zest and poppy seeds for a citrusy flavor.
- Dried Fruit Scones: Mix in dried currants, raisins, or cranberries for a sweet, chewy texture.
- Chocolate Chip: Fold in chocolate chips for a sweet treat that’s sure to please.
How do I Store Nigella Buttermilk Scones Leftovers?
Proper storage is key to keeping your scones fresh and delicious.
Here’s how:
- Room Temperature: Store cooled scones in an airtight container at room temperature for up to 2 days.
- Refrigerate: For longer storage, refrigerate in an airtight container for up to a week.
- Freeze: Wrap scones individually in plastic wrap and place them in a freezer bag. Freeze for up to 3 months.
How do I Reheat Nigella Buttermilk Scones Leftovers?
Reheating scones can restore their warmth and freshness. Follow these tips:
- Oven Method: Warm scones in a preheated 300°F (150°C) oven for about 10 minutes.
- Microwave: For a quick option, microwave a scone on high for 10-20 seconds.
- Toaster Oven: A toaster oven set to a low-medium heat can also rejuvenate a scone nicely.
Nutrition Value (per serving):
- Calories: Approximately 150-200 kcal
- Protein: 4g
- Fat: 6g (Saturated Fat: 3.5g)
- Carbohydrates: 22g
- Sugar: 5g
- Fiber: 1g
- Sodium: 200mg
FAQs
Can I Make Buttermilk Scones Ahead of Time?
Yes, you can prepare scones ahead of time in two ways. First, you can make the dough, cut it into shapes, and then refrigerate overnight before baking. Or, bake the scones and once cooled, freeze them. When ready to serve, thaw at room temperature or gently reheat in the oven or microwave. This flexibility makes them perfect for planning ahead for breakfasts or gatherings.
Can I Use Regular Milk Instead of Buttermilk in Nigella Buttermilk Scones?
Yes, you can use regular milk as a substitute for buttermilk, but for best results, add 1 tablespoon of lemon juice or white vinegar to each cup of milk and let it sit for 5 minutes before using. This mixture won’t replicate the thickness of buttermilk but will provide the necessary acidity to interact with the baking powder, producing a similar rise and texture.
How Do I Ensure My Scones Are Fluffy and Not Dense?
To achieve fluffy scones, make sure not to overmix the dough. Mix just until the ingredients are combined. Also, use cold butter and buttermilk, as the cold fat will melt in the oven, creating steam pockets that contribute to a light and airy texture. Lastly, avoid over-kneading; a few gentle folds are all you need to bring the dough together.
What’s the Best Way to Cut Out Scones Without a Cutter?
If you don’t have a round cutter, you can use the open end of a clean, sharp-edged glass or cup. Alternatively, you can lightly flour a knife and cut the dough into squares or triangles, which does not require re-rolling scraps and thus can prevent the dough from becoming overworked.
Final Words
In conclusion, making Nigella Lawson’s Buttermilk Scones is a straightforward and rewarding process. This recipe is great for anyone looking to bake something quick and tasty. The steps are easy to follow, making it accessible for both beginners and experienced bakers. These scones are versatile, and suitable for various occasions or simply as a treat for yourself. By following this guide, you’ll be able to enjoy delicious scones in no time. So, why wait? Start baking and enjoy the delicious results.
