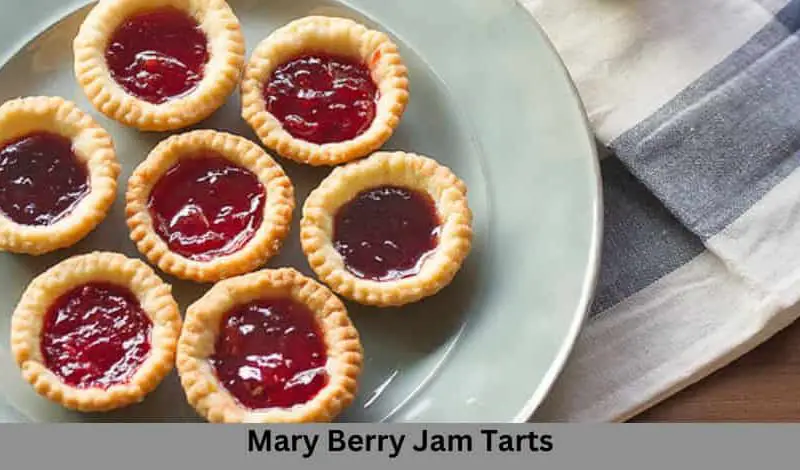
Mary Berry Jam Tarts are delightful pastries with a buttery shortcrust base and a sweet, fruity jam filling. Perfect for tea time, parties, or a simple family treat, these tarts are a classic that never goes out of style.
This recipe serves 12-15 people and can be prepared in approximately 45 minutes to 1 hour.
In this article, I will show you how to make Mary Berry Jam Tarts step by step, with tips and tricks along the way.
What Are Mary Berry Jam Tarts?
Mary Berry Jam Tarts are traditional British pastries featuring a crisp shortcrust pastry filled with various fruit jams. They are simple yet incredibly satisfying.
Other Popular Recipes
Why You’ll Love This Recipe
- Easy to Make: Simple ingredients and straightforward steps make this recipe perfect for beginners.
- Versatile: You can use any fruit jam you like, from strawberry to apricot.
- Kid-Friendly: Children love helping out with this fun and tasty baking project.
- Perfect for Any Occasion: Ideal for afternoon tea, parties, or just a sweet snack.
- Classic Flavor: The combination of buttery pastry and sweet jam is timeless.
Ingredients Needed to Make Mary Berry Jam Tarts
- Shortcrust Pastry: 250g (8.8 oz) of plain flour, 125g (4.4 oz) of unsalted butter (cold and diced), 1 egg yolk, and 2-3 tablespoons of cold water.
- Fruit Jam: 150g (5.3 oz) of your favorite fruit jam (strawberry, raspberry, apricot, etc.).
- Sugar (Optional): A sprinkle of caster sugar for added sweetness.
Equipment
- Mixing bowl
- Rolling pin
- Tartlet tin or muffin tin
- Pastry cutter
- Spoon
Instructions to Make Mary Berry Jam Tarts
Step 1: Prepare the Shortcrust Pastry
- Mix the Dry Ingredients: In a mixing bowl, combine the flour and a pinch of salt.
- Rub in the Butter: Add the diced butter and rub it into the flour using your fingertips until the mixture resembles breadcrumbs.
- Add the Egg Yolk: Mix in the egg yolk and gradually add cold water, one tablespoon at a time, until the dough comes together.
- Chill the Dough: Wrap the dough in cling film and refrigerate for 15-20 minutes.
Step 2: Roll Out the Pastry
- Preheat the Oven: Preheat your oven to 180°C (350°F).
- Roll the Dough: On a floured surface, roll out the dough to about 3mm thickness.
- Cut the Pastry: Use a pastry cutter to cut out circles slightly larger than your tartlet tin.
- Line the Tin: Gently press the pastry circles into the tartlet tin.
Step 3: Fill and Bake
- Add the Jam: Place a teaspoon of jam into each pastry case.
- Bake the Tarts: Bake in the preheated oven for 15-20 minutes, until the pastry is golden and the jam is bubbling.
- Cool the Tarts: Allow the tarts to cool in the tin for a few minutes before transferring them to a wire rack to cool completely.
What Do I Serve With Mary Berry Jam Tarts?
- Clotted Cream: Adds a rich, creamy texture.
- Vanilla Ice Cream: Perfect for a warm tart.
- Fresh Berries: Complements the fruity jam filling.
- A Cup of Tea: A classic pairing.
- Lemon Curd: For an extra zingy flavor.
Pro Tips to Make Perfect Mary Berry Jam Tarts
- Chill the Dough: Helps prevent the pastry from shrinking during baking.
- Don’t Overfill: Prevents the jam from overflowing and burning.
- Use cold butter, which ensures a flaky, tender pastry.
- Rotate the Tin: Ensures even baking.
- Experiment with Jams: Try different flavors for variety.
Variations of Mary Berry Jam Tarts
- Lemon Curd Tarts: Use lemon curd instead of jam.
- Almond Tarts: Add a frangipane filling for a nutty twist.
- Mini Tarts: Use smaller tins for bite-sized treats.
- Chocolate Tarts: Fill with chocolate spread instead of jam.
- Savory Tarts: Try a cheese and onion filling for a savory version.
How Do I Store Mary Berry Jam Tarts Leftovers?
- Airtight Container: Keeps the tarts fresh for up to 3 days.
- Refrigerate: For up to a week if you prefer them chilled.
- Freeze: Store in the freezer for up to 2 months.
- Separate Layers: Place parchment paper between layers to prevent sticking.
- Avoid Direct Sunlight: Keep them in a cool, dark place.
How Do I Reheat Mary Berry Jam Tarts Leftovers?
- Oven: Reheat in a preheated oven at 150°C (300°F) for 5-10 minutes.
- Microwave: Heat on medium power for 20-30 seconds.
- Toaster Oven: Ideal for reheating a single tart.
- Room Temperature: Leave out for 30 minutes if you prefer them at room temperature.
- Avoid Overheating: Prevents the jam from becoming too runny.
Nutrition Value (per serving):
- Calories: 150
- Fat: 7g
- Carbohydrates: 20g
- Sugars: 10g
- Protein: 2g
- Fiber: 1g
- Sodium: 60mg
FAQs
How do I prevent my jam tarts from becoming soggy?
To prevent your jam tarts from becoming soggy, make sure to blind-bake the pastry shells for about 5 minutes before adding the jam. This helps set the pastry and creates a barrier that prevents the jam from seeping into the crust.
Can I use store-bought pastry for Mary Berry Jam Tarts?
Yes, you can use store-bought shortcrust pastry to save time. Just roll it out, cut it into circles, and proceed with the recipe as instructed. It’s a convenient option that still delivers delicious results.
What type of jam is best for making Mary Berry Jam Tarts?
The best type of jam for Mary Berry Jam Tarts is a thick, high-quality fruit jam. Strawberry, raspberry, and apricot jams are popular choices. Avoid using jelly as it tends to be too runny and can make the tarts overly sweet.
How do I know when my jam tarts are done baking?
Your jam tarts are done baking when the pastry is golden brown and the jam is bubbling. This usually takes about 15-20 minutes in a preheated oven at 180°C (350°F). Let them cool in the tin for a few minutes before transferring them to a wire rack.
Final Words
Mary Berry Jam Tarts are a delightful treat that’s easy to make and sure to impress. Whether you’re a seasoned baker or just starting, this recipe is perfect for any occasion. Enjoy the process and savor the delicious results!