Today, I’m going to show you how to make Mary Berry’s red velvet cupcakes, a delicious treat that will impress your guests.
In this guide, I will walk you through the steps of making Mary Berry’s red velvet cupcakes, and I will also share some tips and tricks to make them even better. You will learn how to:
- Make the cupcake batter
- Bake the cupcakes
- Make the cream cheese frosting
- Decorate the cupcakes
- Store and serve the cupcakes
Are you ready to make some mouthwatering red velvet cupcakes? Let’s get started
What are Mary Berry Red Velvet Cupcakes?
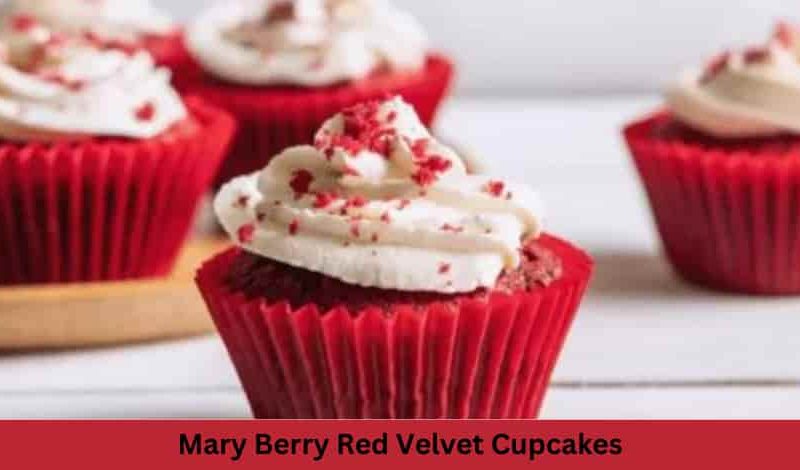
Mary Berry Red Velvet Cupcakes are a type of cake that originated in the United States and became popular in the 20th century. They are made with a chocolate sponge that has a red color, usually from food coloring or beetroot juice. They are topped with a cream cheese frosting that adds a tangy and creamy contrast to the sweet and moist cake. They are often decorated with red velvet cake crumbs, chocolate shavings, sprinkles, or fresh berries.
Mary Berry uses basic ingredients that you probably already have in your pantry, and it only takes 25 minutes to prepare and 15 minutes to bake. Plus, it has a secret ingredient that gives the cupcakes a deep red color and a subtle tangy flavor: white wine vinegar.
Love these Recipes

Why You Love this Recipe
This recipe offers numerous reasons to earn your affection, and here are some of its standout qualities:
- Effortless Preparation: Crafting these cupcakes is a breeze, thanks to straightforward instructions and readily available ingredients found in your pantry.
- Reliable Results: With Mary Berry’s expert guidance, you can trust that these cupcakes will turn out perfectly every time, making it a foolproof choice.
- Delectable Delight: Savor the delightfully rich chocolate flavor and the irresistibly velvety texture that defines this dessert.
- Customizable Creativity: Embrace your inner chef by personalizing the frosting and decorations to suit your unique taste and style.
- Visually Stunning: The vibrant red color and impeccable presentation of these cupcakes add a touch of festivity and elegance to any occasion.
Ingredients Needed to Make Mary Berry Red Velvet Cupcakes
Before we begin, let’s gather all the ingredients we need for this recipe. You will need:
For the cupcakes:
- 100g (4oz) butter, softened
- 150g (5oz) caster sugar
- 1 large egg, beaten
- 1 tsp vanilla paste or extract
- 100ml (3½fl oz) buttermilk or kefir
- 50ml (2fl oz) vegetable oil
- 1 tsp white wine vinegar
- 1 tbsp red gel food coloring
- 150g (5oz) plain flour
- 1 tbsp cocoa powder
- 1 tsp bicarbonate of soda
- A pinch of salt
For the cream cheese frosting:
- 100g (4oz) slightly salted butter, softened
- 225g (8oz) icing sugar, sifted
- 100g (4oz) full-fat cream cheese, stirred to loosen
Useful Equipment
You will also need the following equipment :
- A 12-hole muffin tin
- 12 paper cupcake cases
- A stand mixer or an electric hand whisk
- A large mixing bowl
- A medium mixing bowl
- A sieve
- A spatula
- A skewer
- A piping bag with a star nozzle (optional)
- A wire rack
Instructions to Make Mary Berry Red Velvet Cupcakes
Step 1: How to Make the Cupcake Batter
The first step is to make the cupcake batter, which is very easy and quick. Here’s how to do it:
- Preheat your oven to 180°C/160°C fan/gas 4 and line your muffin tin with the paper cases.
- In a large mixing bowl, use your stand mixer or electric hand whisk to beat together the butter and sugar until light and fluffy, about 3 minutes.
- Add the egg, vanilla, buttermilk, oil, vinegar, and food coloring and beat again until well combined. The mixture should be smooth and bright red. If it looks too pale, you can add more food coloring, but be careful not to overdo it.
- In a medium mixing bowl, sieve together the flour, cocoa, bicarbonate of soda, and salt and whisk to combine.
- Gradually add the dry ingredients to the wet ingredients and mix until just combined. Do not overmix the batter, or the cupcakes will be tough and dense.
- Divide the batter evenly among the paper cases, filling them about two-thirds full. You can use a spoon or an ice cream scoop to do this.
Step 2: How to Bake the Cupcakes
Now that the batter is ready, it’s time to bake the cupcakes.
Here’s how to do it:
- Place the muffin tin in the middle rack of your oven and bake for 15 minutes, or until a skewer inserted into the center of a cupcake comes out clean.
- Remove the muffin tin from the oven and let the cupcakes cool slightly in the tin for 5 minutes.
- Transfer the cupcakes to a wire rack and let them cool completely before frosting.
Step 3: How to Make the Cream Cheese Frosting
While the cupcakes are cooling, you can make the cream cheese frosting, which is the perfect complement to the chocolate sponge.
Here’s how to do it:
- In a large mixing bowl, use your stand mixer or electric hand whisk to beat together the butter and icing sugar until pale and fluffy, about 3 minutes.
- Add the cream cheese and beat for another 1-2 minutes until well combined and smooth. Do not overbeat the frosting, or it will become runny and lose its shape.
- If you want to pipe the frosting, transfer it to a piping bag fitted with a star nozzle and refrigerate it for 10 minutes to firm up slightly. If you want to spread the frosting, you can skip this step.
Step 4: How to Decorate the Cupcakes
The final step is to decorate the cupcakes, which is the fun part. You can be as creative as you want, but here are some suggestions:
- Piping the Frosting: Start by piping the frosting in a circular motion from the outside to the center of each cupcake. This creates an elegant and neat swirl.
- Spreading the Frosting: For a simpler look, use a spatula or knife to evenly spread the frosting over each cupcake. Aim for a smooth and even layer.
- Adding Extras for Texture and Color: Consider topping the frosting with red velvet crumbs, chocolate shavings, or sprinkles. These not only add visual appeal but also introduce a variety of textures.
- Adding Fresh Berries: Placing fresh berries like raspberries, strawberries, or cherries on top adds a touch of natural sweetness and creates a beautiful color contrast, enhancing the overall look of the cupcakes.

What Do I Serve With Mary Berry Red Velvet Cupcakes?
Mary Berry Red Velvet Cupcakes are a great dessert for any occasion, and they can be served on their own or with some accompaniments.
Here are some suggestions:
- Whipped cream, ice cream, or custard for some extra indulgence.
- Fresh fruit, such as raspberries, strawberries, or cherries, for some freshness and contrast.
- A glass of milk, tea, coffee, or hot chocolate for a cozy and comforting drink.
- A glass of champagne, wine, or cocktail for a celebratory and elegant drink.
Pro Tips to Make Perfect Mary Berry Red Velvet Cupcakes
To ensure your red velvet cupcakes are exceptional, consider these expert tips:
- Ingredients at Room Temperature: For the best results, bring ingredients like butter, eggs, and cream cheese to room temperature before starting. This step is crucial for achieving a smooth and uniform batter and frosting.
- Selecting the Right Food Coloring: Opt for high-quality red gel food coloring to attain a rich and authentic color. Gel coloring is preferable as it imparts a more vibrant hue compared to liquid forms. If you’re exploring natural alternatives, beetroot juice or powder can be used, though they might slightly alter the flavor and texture.
- The Role of Vinegar: Incorporate white wine vinegar into your recipe. It interacts with the bicarbonate of soda and cocoa, contributing to the cupcakes’ signature red shade and a subtly tangy flavor. Apple cider vinegar or lemon juice are viable substitutes but may slightly vary the taste and color.
- Avoid Overmixing: Overmixing the batter or frosting can lead to a dense and runny consistency. Mix just until the ingredients are combined and smooth, making sure to scrape the bowl’s sides and bottom with a spatula.
- Baking Time and Temperature: Be vigilant about not overbaking the cupcakes. Begin checking them at the 15-minute mark. A skewer inserted into the center should come out clean when they’re ready. If not, allow them to bake for an additional 1-2 minutes before rechecking.
- Cooling Before Frosting: Let the cupcakes cool thoroughly before applying the frosting. If they are too warm, the frosting may melt. To expedite cooling, you can place them in the refrigerator or freezer for a short period.
Variations of Mary Berry Red Velvet Cupcakes
You can make some variations of Mary Berry Red Velvet Cupcakes by changing the flavor or the color of the cake or the frosting. Here are some ideas:
- Chocolate Red Velvet Cupcakes: Add more cocoa powder to the batter, and use chocolate cream cheese frosting or ganache instead of plain cream cheese frosting.
- Vanilla Red Velvet Cupcakes: Omit the cocoa powder from the batter, and use vanilla paste or extract instead of vinegar. Use vanilla buttercream or cream cheese frosting.
- Pink Velvet Cupcakes: Use pink gel food coloring instead of red, and add some strawberry or raspberry flavoring to the batter and the frosting. Decorate with fresh or dried berries.
- Blue Velvet Cupcakes: Use blue gel food coloring instead of red, and add some blueberry or lemon flavoring to the batter and the frosting. Decorate with fresh or dried blueberries.
- Green Velvet Cupcakes: Use green gel food coloring instead of red, and add some mint or lime flavoring to the batter and the frosting. Decorate with chocolate chips or mint leaves.
How do I store Mary Berry Red Velvet Cupcakes Leftovers?
If you have any leftovers of Mary Berry Red Velvet Cupcakes, you can store them in an airtight container in the fridge for up to 3 days, or in the freezer for up to 3 months.
Here are some tips on how to store them properly:
In the fridge:
- Let the cupcakes cool completely before storing them, as they will become soggy and moldy if they are warm or moist.
- Place them in a single layer in an airtight container, or wrap them individually in plastic wrap or foil.
- Keep them away from strong-smelling foods, as they will absorb the odors and lose their flavor.
- Take them out of the fridge about 15 minutes before serving, to let them come to room temperature and soften the frosting.
In the freezer:
- Let the cupcakes cool completely before freezing them, as they will become icy and crumbly if they are warm or moist.
- Place them in a single layer on a baking sheet, and freeze them for about an hour, until they are firm.
- Transfer them to a freezer-safe bag or container, and label them with the date and the name of the recipe.
- Thaw them in the fridge overnight before serving, or in the microwave for a few seconds if you are in a hurry.
How do I reheat Mary Berry Red Velvet Cupcakes Leftovers?
If you want to reheat Mary Berry Red Velvet Cupcakes leftovers, you can do so in the oven or the microwave.
Here are some tips on how to reheat them properly:
In the oven:
- Preheat your oven to 160°C/140°C fan/gas 3 and line a baking sheet with parchment paper.
- Place the cupcakes on the prepared baking sheet, and cover them loosely with foil.
- Bake them for 5-10 minutes, or until they are warm and soft.
- Remove them from the oven and let them rest for a few minutes before serving.
In the microwave:
- Place the cupcakes on a microwave-safe plate, and cover them loosely with a damp paper towel.
- Microwave them for 10-15 seconds, or until they are warm and soft.
- Remove them from the microwave and let them rest for a few minutes before serving.
Nutrition value per serving (based on 6 Serving):
- Calories: 339 kcal
- Fat: 17 g
- Saturates: 8 g
- Carbs: 42 g
- Sugars: 32 g
- Fibre: 1 g
- Protein: 3 g
- Salt: 0.59 g
FAQs
Why are my red velvet cupcakes not red enough?
The red color of the cupcakes depends on the type and amount of food coloring you use. If you use a natural food coloring, it may not be as vibrant as a synthetic one. If you use a liquid food coloring, it may dilute the batter and make it less red. To get a deeper red color, use red gel food coloring, and add enough to make the batter bright red. You can also use white wine vinegar, as it reacts with the cocoa and the bicarbonate of soda to create the red hue.
Why are my red velvet cupcakes dry and crumbly?
The cupcakes may be dry and crumbly if you overmix the batter, overbake the cupcakes, or use too much flour. To avoid these problems, mix the batter until just combined and smooth, check the cupcakes after 15 minutes of baking and insert a skewer into the center to see if they are done, and measure the flour by spooning and leveling it in a measuring cup, not by scooping it directly from the bag.
Why are my red velvet cupcakes sinking in the middle?
The cupcakes may sink in the middle if you open the oven door too early or too often if you use too much leavening agent, or if you use expired ingredients. To prevent this, keep the oven door closed until the cupcakes are almost done, use the exact amount of bicarbonate of soda and baking powder as specified in the recipe, and check the freshness of your ingredients before using them.
How can I make red velvet cupcakes without buttermilk?
Buttermilk adds moisture and tanginess to the cupcakes, but if you don’t have it, you can substitute it with kefir, yogurt, sour cream, or milk mixed with vinegar or lemon juice. For this recipe, you can use 100ml of any of these alternatives instead of buttermilk.
Final Words
Congratulations, you have just learned how to make Mary Berry’s red velvet cupcakes, a delicious and easy dessert that will wow your guests. I hope you enjoyed this guide and found it helpful. If you have any questions, comments, or feedback, please let me know in the comment section below. I would love to hear from you. And if you liked this recipe, please share it with your friends and family.
Thank you for reading, and happy baking!