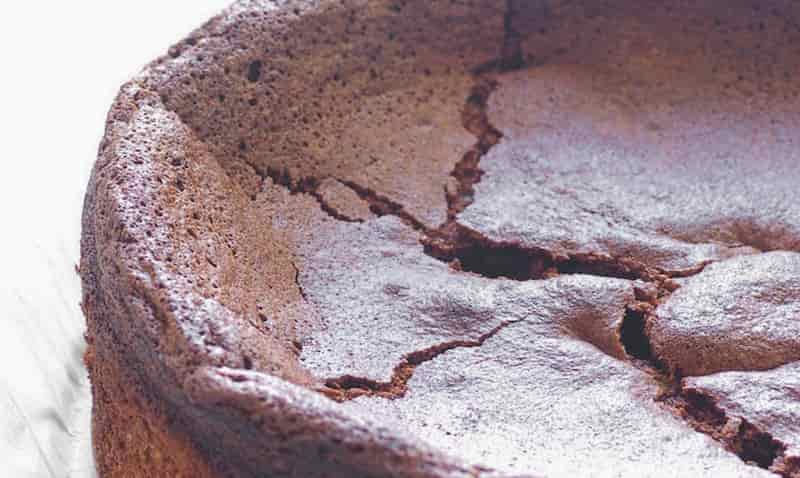
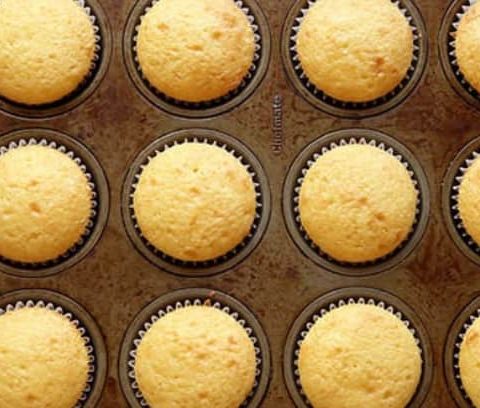
Baking a cake is a fun and rewarding activity, but it can also be frustrating when your cake falls or sinks in the middle after taking it out of the oven. A fallen cake can ruin the appearance and texture of your dessert, and make you feel like you wasted your time and ingredients. But don’t worry, there are ways to prevent and fix a cake from falling after baking.
In this article, I’ll share with you 8 tips on how to keep a cake from falling after baking, and what to do if it happens anyway.
- Learn: The Basics of Cake Baking
What Causes a Cake to Fall After Baking?
Before we get into the solutions, let’s understand what causes a cake to fall after baking. There are several factors that can affect the rise and structure of a cake, such as:
- The ingredients: The quality, quantity, and temperature of the ingredients can make a big difference in how your cake turns out. For example, using too much or too little leavening agent (baking powder, baking soda, yeast, etc.) can cause your cake to rise too fast or too slow, and then collapse. Using expired or cold ingredients can also affect the chemical reactions and the consistency of the batter.
- The mixing method: How you mix your batter can also affect the rise and structure of your cake. For example, overmixing or undermixing can create air bubbles or pockets of flour that can cause your cake to fall. Creaming the butter and sugar properly can help create a stable and fluffy batter that can hold its shape.
- The oven temperature and time: How you bake your cake can also affect the rise and structure of your cake. For example, baking your cake at too high or too low a temperature can cause your cake to rise too fast or too slow, and then collapse. Opening the oven door too early or too often can also cause the temperature to drop and the cake to fall. Baking your cake for too long or too short can also affect the doneness and the moisture of the cake.
How to Prevent a Cake from Falling After Baking
Now that we know what causes a cake to fall after baking, let’s see how we can prevent it from happening.
Here are 8 tips on how to keep a cake from falling after baking:
1. Strictly Follow the Recipe
Importance of Accuracy:
Small changes can have big impacts. Use a digital scale for precise measurements.
Role of Each Ingredient:
Understand why each ingredient is used. For instance, eggs add structure, while sugar tenderizes.
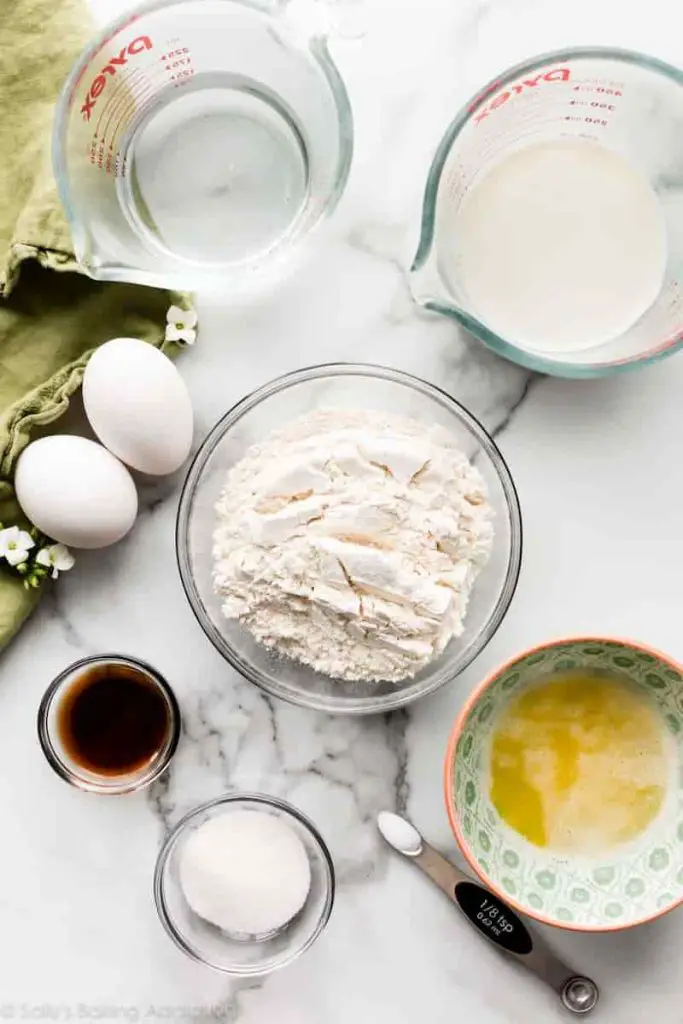
2. Ingredient Quality and Temperature
Quality Check:
Use high-quality ingredients for better results. Low-quality flour or fat can adversely affect texture.
Temperature Control:
Room-temperature ingredients blend more uniformly, providing a consistent texture. Cold eggs or butter can result in a curdled batter, affecting rise and texture.
- Related: How Much is a 1/4 Sheet Cake Size
3. Mastering Creaming Technique
Air Incorporation:
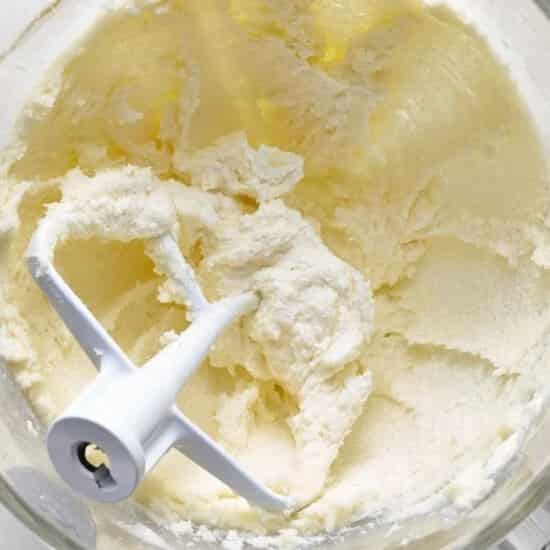
The creaming method is a foundational technique in many cake recipes. It involves beating together butter and sugar until light and fluffy. This process traps air bubbles in the butter, and these bubbles expand in the oven, contributing to the cake’s rise. The amount of air incorporated during creaming can determine the cake’s texture and volume. It’s essential for creating a light, airy structure in cakes like pound or butter cakes.
Visual Cues for Perfect Creaming:
Achieving the right consistency in creaming is about observing color and texture changes. The mixture should transform from dense and yellowish to a pale, almost white, fluffy consistency. This usually takes about 3-5 minutes with an electric mixer on medium to high speed. An under-creamed mixture, which hasn’t been beaten long enough, will lack the necessary air for proper rise. On the other hand, over-creaming can result in a greasy texture where the sugar has dissolved completely, making the cake rise too quickly and then collapse.
4. Balanced Batter Mixing
Gluten Development:
Gluten is a protein that gives structure to baked goods. While essential for bread, too much gluten development in cakes can lead to a tough, rubbery texture. Therefore, when adding flour to the creamed butter and sugar, mix only until the flour is no longer visible. Overmixing at this stage develops more gluten, resulting in a dense cake.
Mixing Methods:
Different cakes require different methods of mixing. For instance, the ‘muffin method’ (mixing all wet ingredients separately, then combining with dry ingredients) is ideal for denser, moister cakes. This method helps in minimizing gluten development. On the other hand, the ‘sponge method’, involving beating eggs and sugar to the ribbon stage before folding in the flour, is great for lighter, airier cakes like a sponge or angel food cakes. Understanding the appropriate method for your cake type is crucial for achieving the desired texture.
5. Oven Preparation and Pan Setup
Oven Calibration:
Ensuring your oven’s temperature accuracy is crucial for consistent baking results. An oven that’s off by even a few degrees can significantly affect your cake. Using an oven thermometer is a reliable way to verify the actual temperature inside your oven, as built-in thermostats can sometimes be inaccurate. Regularly checking and calibrating your oven can make the difference between an evenly baked cake and one that’s under or overcooked.
Pan Considerations:
The choice of pan can greatly influence the outcome of your cake. The size and shape of the pan should align with the recipe’s specifications. A pan too large can lead to thin, overbaked cakes, while a too-small pan might cause the batter to overflow. Material matters too: Dark-colored pans tend to absorb more heat, which can lead to faster and uneven cooking around the edges and bottom. Lighter-colored or aluminum pans generally promote even baking. Always consider lining the bottom of the pan with parchment paper to ensure easy release and uniform cooking.
6. Precise Baking Temperature and Timing
Oven Hot Spots:
Most ovens have areas that heat differently, known as hot spots. These can cause parts of the cake to bake faster than others, leading to uneven baking and a potential fall. To mitigate this, find out where these hot spots are by baking a sheet of cookie dough or toasting bread slices and observing where they brown first. Once identified, you can adjust the position of your cake pan accordingly. Typically, placing the pan in the center of the oven offers the most uniform heat distribution.
Baking Time Adjustments:
Ovens can vary, and your specific model might run hotter or cooler than what’s indicated. This variation can affect the baking time of your cake. If you know your oven runs hot, consider setting it slightly lower than the recipe suggests. Conversely, if it runs cool, you might need to increase the temperature or bake for longer. Start checking for doneness a few minutes before the recipe’s suggested time. A cake tester or toothpick inserted into the cake’s center should come out clean or with a few moist crumbs. Overbaking can dry out your cake while underbaking may lead to a collapsed center.
7. Minimizing Oven Door Interference
Temperature Stability:
Each time the oven door opens, the temperature can drop 25-50 degrees Fahrenheit, affecting the cake’s structure.
Use Oven Light and Window:
To check on the cake’s progress, use the oven light and window instead of opening the door.
8. Proper Cooling Techniques
Cooling Stages:
Cooling is as critical as baking in the cake-making process. After baking, let the cake cool in the pan on a wire rack for the time specified in the recipe – usually 10-15 minutes. This allows the cake to become firm enough to remove from the pan without breaking apart. Then, gently remove the cake from the pan and let it cool completely on a wire rack. This final cooling stage is essential for the cake’s crumb to set and stabilize.
Handling the Cake:
Care is paramount when transferring the cake from the pan to the cooling rack. Use a knife to loosen the edges, and if possible, gently invert the pan onto the rack. If the cake is too delicate for inversion, lift it out carefully using the parchment paper as a guide. Disturbing the cake too much at this stage can cause it to fall apart or become dense. Once on the rack, avoid moving the cake until it has cooled completely, as it’s still setting and fragile when warm.
Popular Cake Recipes to Try
- Delia Smith Lemon Drizzle Cake
- Mary Berry Coffee and Walnut Cake
- Mary Berry Chocolate and Orange Cake
- Mary Berry Chocolate Courgette Cake
- Mary Berry Rock Cakes
- Mary Berry Baileys Cheesecake
- Mary Berry Pineapple Upside Down Cake
How to Fix a Cake that Has Fallen After Baking
If your cake has fallen after baking, don’t worry! It’s not the end of the world, and there are several simple yet effective ways to salvage it and make it both presentable and tasty. Here’s what you can do if you find yourself with a fallen cake:
Trimming the Top:
If you’re dealing with a cake that has a small dent or cracks in the middle, a quick fix is to trim the top. Use a serrated knife to level it off. Once it’s even, go ahead and frost it as you normally would. This little trick will hide the imperfection seamlessly.
Filling the Gap:
For cakes with a larger hole or gap, filling it is a great solution. You can use anything like frosting, whipped cream, custard, or even fruit. Fill in the gap, then add another layer of frosting or cake on top, and finish it off with your usual decorations.
- Learn: Cake Filling Types
Cutting into Pieces:
When the cake is too uneven or sunken to be fixed with trimming, consider cutting it into smaller pieces. Serve these as individual bars, squares, or bites. To enhance their appeal, drizzle them with glaze, ganache, or your favorite sauce. This not only adds flavor but also improves their moisture content.
Making a Trifle:
If the cake is too dry or crumbly, turning it into a trifle can be a wonderful way to repurpose it. A trifle consists of layers of cake, custard, whipped cream, and fruit, sometimes with a bit of liquor added for extra flavor. Start by cutting the cake into cubes, then layer them in a bowl with the other ingredients. This method not only saves your cake but also creates a completely new and delicious dessert.
FAQs
Here are some frequently asked questions about how to keep a cake from falling after baking:
Why Does My Cake Fall in the Middle?
A cake falling in the middle can be due to several reasons. One common cause is underbaking, where the cake hasn’t had enough time to set its structure, leading to collapse as it cools. Overheating the batter can also introduce too much air, which expands in the oven and then deflates. Incorrect oven temperature, either too hot or too cool, can also lead to uneven baking. Moreover, opening the oven door too frequently can cause temperature fluctuations, affecting the cake’s rise. Ensuring accurate measurements, proper mixing, and baking at the right temperature for the correct duration can help prevent this issue.
How Do You Fix a Sunken Cake?
To fix a sunken cake, you can try the following methods:
- Trimming the Top: If the depression is minor, level the cake with a serrated knife and then frost it to hide the imperfection.
- Filling the Gap: For larger sunken areas, fill the gap with frosting, custard, or fruit fillings, then cover with more frosting or another cake layer.
- Cut into Pieces: If the cake is too uneven, cut it into bars, squares, or bites, and serve it with a glaze or sauce.
- Make a Trifle: For excessively dry or crumbly cakes, layer the crumbled cake with custard, whipped cream, and fruit in a trifle dish.
How Long Should You Let a Cake Cool Before Removing from the Pan?
It’s generally recommended to let a cake cool in its pan on a wire rack for about 10-15 minutes. This duration allows the cake to firm up enough to be removed without breaking apart. For denser cakes, like pound cakes, you may need to extend this cooling period up to 30 minutes. However, leaving the cake in the pan for too long can cause it to become damp and stick to the pan, so timing is essential.
Can You Rebake an Undercooked Cake?
Yes, you can rebake an undercooked cake. If you find the cake is undercooked immediately after removing it from the oven, return it quickly. Set the oven to the original baking temperature and check every 5-10 minutes until done. However, if the cake has cooled significantly, rebaking might not be as effective, and the texture could be affected. In such cases, consider other remedies like turning it into a pudding or trifle.
What Causes a Cake to Be Dry and Crumbly?
A dry and crumbly cake is often the result of overbaking, which causes the moisture to evaporate too much. Another reason could be the wrong proportions of ingredients, particularly too much flour or insufficient fat or sugar. The way ingredients are mixed also plays a role; overmixing can lead to a tough texture. Using ingredients at the correct temperature is also crucial; for example, cold eggs can hinder the emulsification process, leading to a denser cake. To avoid a dry and crumbly cake, measure ingredients accurately, follow the recipe closely, and keep an eye on the baking time.
Why did my cake fall after I took it out of the oven?
There are several reasons why your cake may have fallen after you took it out of the oven, such as using too much or too little leavening agent, overmixing or undermixing the batter, baking at the wrong temperature or time, opening the oven door too early or too often, or not letting the cake cool properly.
Conclusion
Baking a cake can be a fun and rewarding activity, but it can also be frustrating when your cake falls or sinks in the middle after taking it out of the oven. A fallen cake can ruin the appearance and texture of your dessert, and make you feel like you wasted your time and ingredients. But don’t worry, there are ways to prevent and fix a cake from falling after baking. In this article, I shared with you 8 tips on how to keep a cake from falling after baking, and what to do if it happens anyway. I hope you found this article informative and helpful, and that you’ll try these tips the next time you bake a cake. Happy baking!
Other Popular Recipes

